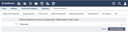
Sending mailings only to those people interested in specific topics can improve the subscribers' satisfaction. Use Mailing Topics to define topics you plan to target mailings for. Then, offer users a way to subscribe to or unsubscribe from these topics. Later, when collecting the recipient email addresses for a mailing, select them by their subscriptions. We will go over all these aspects.
Mailing Topics
Defining mailing topics
On the Mailing Topics edit page, you can specify the names of your mailing topics. The names may be composed of letters, digits, - and _. Special characters such as umlauts and spaces are not valid in topic names. We recommend using short names. Further down this page you can then configure how these topic names are presented to your users, the subscribers. For example, you could present the "Products" topic name as "Our monthly product updates newsletter".
Once the mailing topics have been defined, the view page displays the number of persons who subscribed to them.
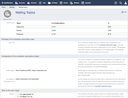
The newsletter subscription page
You can offer your website visitors two different ways to subscribe to your newsletters:
- You can either link to the newsletter subscription page,
- or place the newsletter subscription widget (covered in the next section) directly onto any page of your website.
The newsletter subscription page is a simple page without special layout. Its layout can only be customized with a logo. Even though it is very simple, it implements a complete double opt-in subscription process:
- Ask for the user's email.
- When the form is submitted, the WebCRM sends an email to this address. The email contains a link with a special token.
- Only after clicking the link with the token, the WebCRM displays the user's subscriptions.
- When the user changes the subscriptions and clicks the Save button, the email address gets updated in the database to reflect these changes.
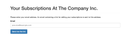
The newsletter subscription process involves a couple of dialogs. The texts to be displayed on these dialog pages can be customized on the Mailing Topics page. When defining the texts, you have access to the {{locale}} Liquid variable and to all templates.All steps after the opt-in step (the first dialog) have access to {{email}}.
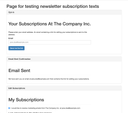
The mailing topics page contains a link to a test page. On this page, you can see all the dialogs a user may encounter. The dialogs are not functional, their only purpose is to let you check the texts and messages without having to click through the process every time you want to check the wording.
We previously mentioned that you can simply link to the newsletter subscription page. A user who follows such a link needs to go through the opt-in process to identify themselves. Without this process, anyone could edit a user's subscriptions without requiring permission to do so.
If you include the following subscription links somewhere in your mailing content, the WebCRM expands the Liquid variables to URLs that contain individual tokens for each recipient. This way, when an email recipient clicks one of the links, the WebCRM is able to identify the corresponding user who, thus, doesn't need to go through the identification process once again.
<a href="{{ unsubscribe_url }}">Unsubscribe Me</a>
<a href="{{ edit_subscriptions_url }}">Edit My Subscriptions</a>
The links are shortcuts to the third dialog page in the process, the Edit Subscriptions dialog.
The embeddable newsletter subscription form
The WebCRM provides a newsletter subscription form you can embed directly into any of the pages of your website. It inherits all the styles and layouts from the page containing it, making it look like an integral part of your site. The widget implements the same opt-in process as the WebCRM-based newsletter subscription page does.
To make the embedded form work in the context of your website, you first need to specify the websites you want to allow to embed the widget. To do this, extend the CORS Origins list in your WebCRM settings accordingly. The allowed websites may be your local development server, http://localhost:3000, and your production server, e.g. https://example.com. When embedded into pages of other websites, the form is dysfunctional.
Then, include the following HTML and JavaScript snippet in the desired page:
<h3 id="crm-subscriptions-headline"></h3>
<p id="crm-subscriptions-infotext"></p>
<div id="crm-subscriptions-form"></div>

<script type="text/javascript">
  var crm_tenant = 'my_tenant_name';
  (function() {
    var s = document.createElement('script'); s.type = 'text/javascript'; s.async = true;
    var params = $.param({
      f: {
        locale: 'en',
        page_url: window.location.href
      }
    })
    s.src = 'https://' + crm_tenant + '.crm.infopark.net/embed/subscriptions?' + params;
    (document.getElementsByTagName('head')[0] || document.getElementsByTagName('body')[0]).appendChild(s);
  })();
</script>
The three HTML elements are identified by their ID attributes. The widget replaces the inner HTML content with the values that correspond to the current dialog in the opt-in process. As the user goes through the process, the inner HTML is changed accordingly. You can, of course, apply styles to the HTML elements as you wish.
The JavaScript code loads the form code from the WebCRM tenant my_tenant_name. Make sure to replace my_tenant_name with your tenant name.
Since you embedded the newsletter subscription widget on your website, you should instruct the WebCRM to include this particular website URL in mailings so that the subscription URLs in the mailing point to your website and not to the newsletter subscription page of your WebCRM.
<a href="{{ unsubscribe_url }}">Unsubscribe Me</a>
<a href="{{ edit_subscriptions_url }}">Edit My Subscriptions</a>
For example, set Link Target for Subscription Links to https://example.com/newsletter if that's the page that includes the form.
Collecting recipient email addresses based on their subscriptions
To address subscribers of your mailing topics in a mailing, you can
- either select the subscribers by creating a contact list and adding mailing recipient filters for Subscribed Topics, Unsubscribed Topics and Active,
- or you can specify the subscribers/unsubscribers when adding/removing mailing deliveries to a mailing.
Specifying a contact list and a topic filter:
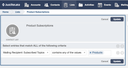
Adding mailing deliveries for subscribers:
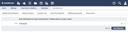
Removing mailing deliveries for unsubscribers: