Accounts and Contact Persons

An account represents an organizational unit, e.g. one of your customers. It holds, among other things, the master data of this unit. You can add as many contact persons as required to an account, with individual contact details (e.g. an address) for each of them. If needed, an account can be associated with a company group. A company group is an optional account attribute. No other data is associated with company groups.

To create an account, first select Accounts from the main menu, then click New Account. If you wish to create an account from an existing one, open it, and click New Account From This Template. This opens a panel for entering the new or, respectively, copied account data:
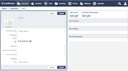
new account

When an account is created, the values for the standard fields as well as the additional fields that were added to the type configuration can be entered. Accounts have got only one mandatory field, their individual name. The length of some fields is limited.

After an account has been created, its details are displayed, which includes several, initially empty, sections, e.g. the list of contact persons assigned to the account. Note that, if the account has an address, and Assign GEO Data has been enabled, you can click the address to have it displayed in Google Maps.

Click New Contact in the Contacts section to the right to add a new contact person to this account. As with accounts, the values of the standard and the additional fields can be entered when a new contact person entry is created.

A couple of facts worth knowing:

  • With persons, their last name, gender, and their language are mandatory fields.
  • All fields that were marked as mandatory in the type configuration for contact persons must be filled in.
  • If the person's and the account's address are the same, you do not need to enter it again. Select the account using the corresponding drop-down box.
  • Persons can be created without assigning them to an account.
  • A contact person's profile photo is taken from gravatar.com if the person's email address has been registered with this service and linked to an image.

Setting a person's login and roles

If a person should be able to log in to your website, the CMS Admin GUI, or the WebCRM, a user name must be given to them, e.g. their email address.

The person needs to have at least one WebCRM role for being able to log in to the WebCRM web interface. For editing content on your website or using the CMS Admin GUI, the person needs to be given the cmsadmin role.

Joining duplicates

If an account or a contact person was created more than once in the WebCRM, you can join the two entries into one. When a duplicate is joined with a target entry, all the data associated with the duplicate (e.g. activities) are assigned to the target.

To join two entries, first open the details of the account or person you identified as a duplicate. Then click Delete and Merge Duplicate. This opens a form for selecting the entry into which the first one should be merged. Click Prepare Consolidation to have a preview of the result of this operation displayed.

After the operation has finished, all the entries previously associated with the duplicate are now assigned to the target entry.

Field length limitations

The length of some account and contact person fields is limited with respect to the number of characters that can be stored in them:

Person field name / maximum lengthAccount field name / maximum length
Fax (fax): 32Name (name): 250
First Name (first_name): 64Account Group (account_group): 100
Job Title (job_title): 100Phone (phone): 32
Last Name (last_name): 64Homepage (home_page): 128
Mobile Phone (mobile_phone): 32
Name Prefix (name_prefix): 64
Phone (phone): 32
Email (email): 128
Address fields (persons and accounts)
Company name (org_name_address): 255
Company unit (org_unit_address): 255
Address extension (extended_address): 255
Street address (street_address): 255
Postal code (postalcode): 16
Locality (locality): 255
Region (region): 50
Country (country): 50